Add-on Creation |
Add-on Creation
NeoAxis Engine has rich features for creating extensions. You can make your own components, can attach .NET assemblies. For add-ons with GUI can use built-in GUI system, WinForms and WPF.
The basic way to create extensions is to create components based on the Component class.
A good place for new classes is NeoAxis.CoreExtension.dll and Project.dll. Project.dll can be edited and compiled in the editor.
Examples of add-ons in form of additional assembly: "Project\Sources\NeoAxis.Addon.ExampleEditorEngineGUI" and "Project\Sources\NeoAxis.Addon.ExampleEditorWinForms".
When dll is made, need to connect it.
- If dll called "NeoAxis.Addon.*.dll" or "NeoAxis.Addon.Editor.*.dll", then it will connect automatically.
- Alternative way is adding dll to "Binaries\NeoAxis.Internal\NeoAxis.DefaultSettings.config" file. Add line "AutoLoadAssembly {Name = NAME.dll}".
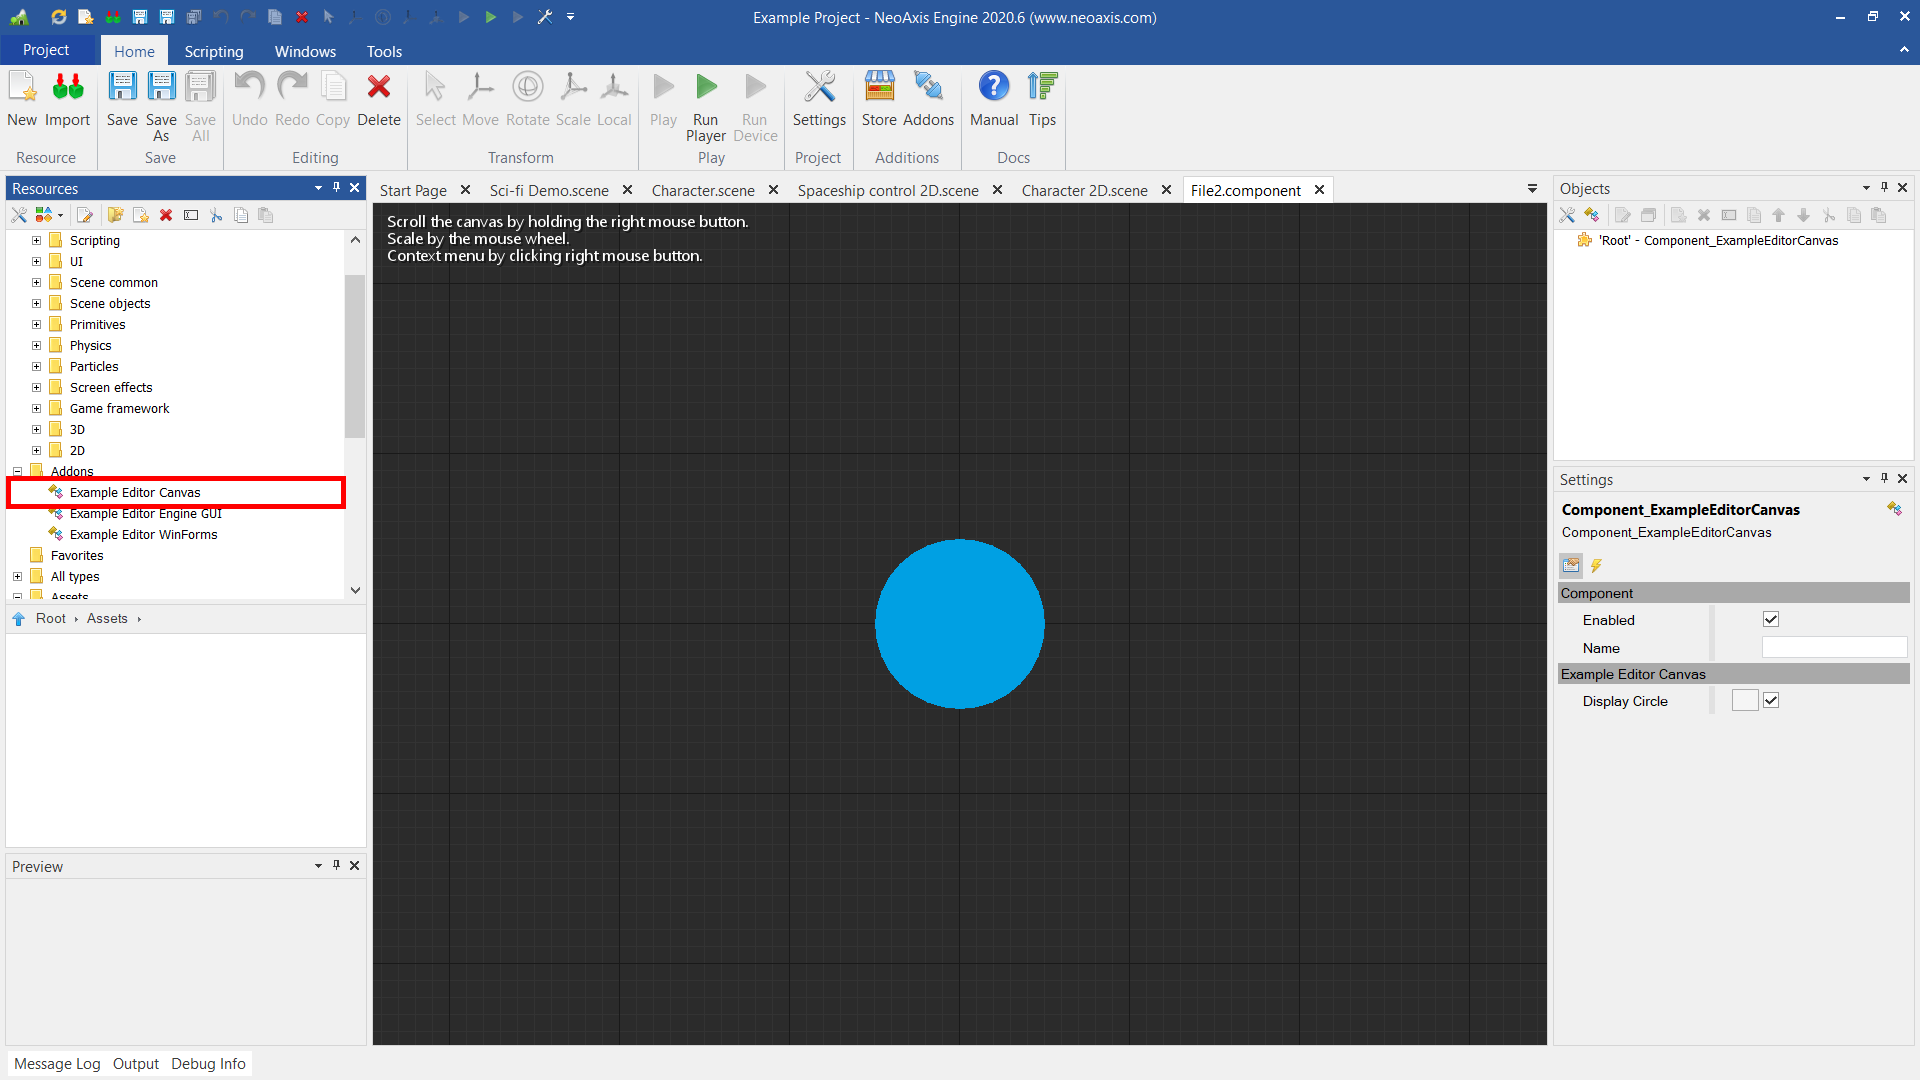
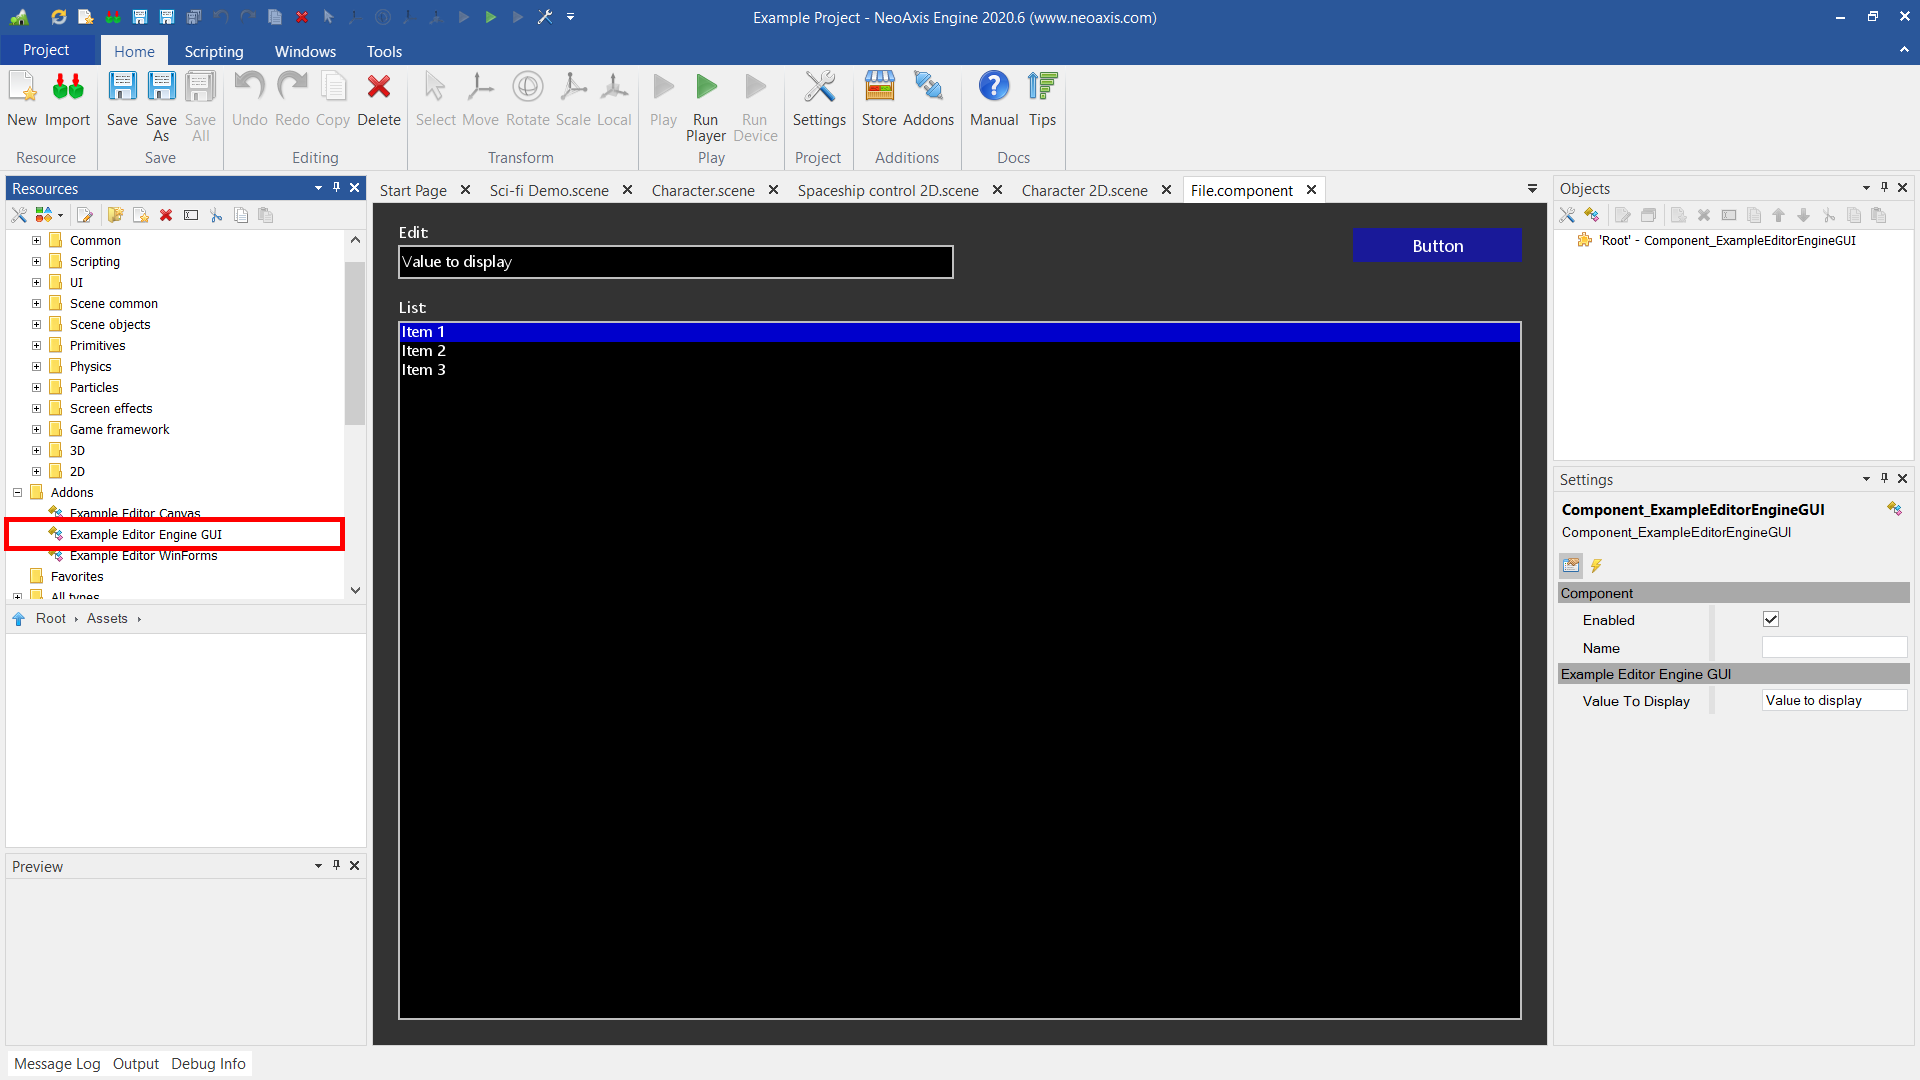
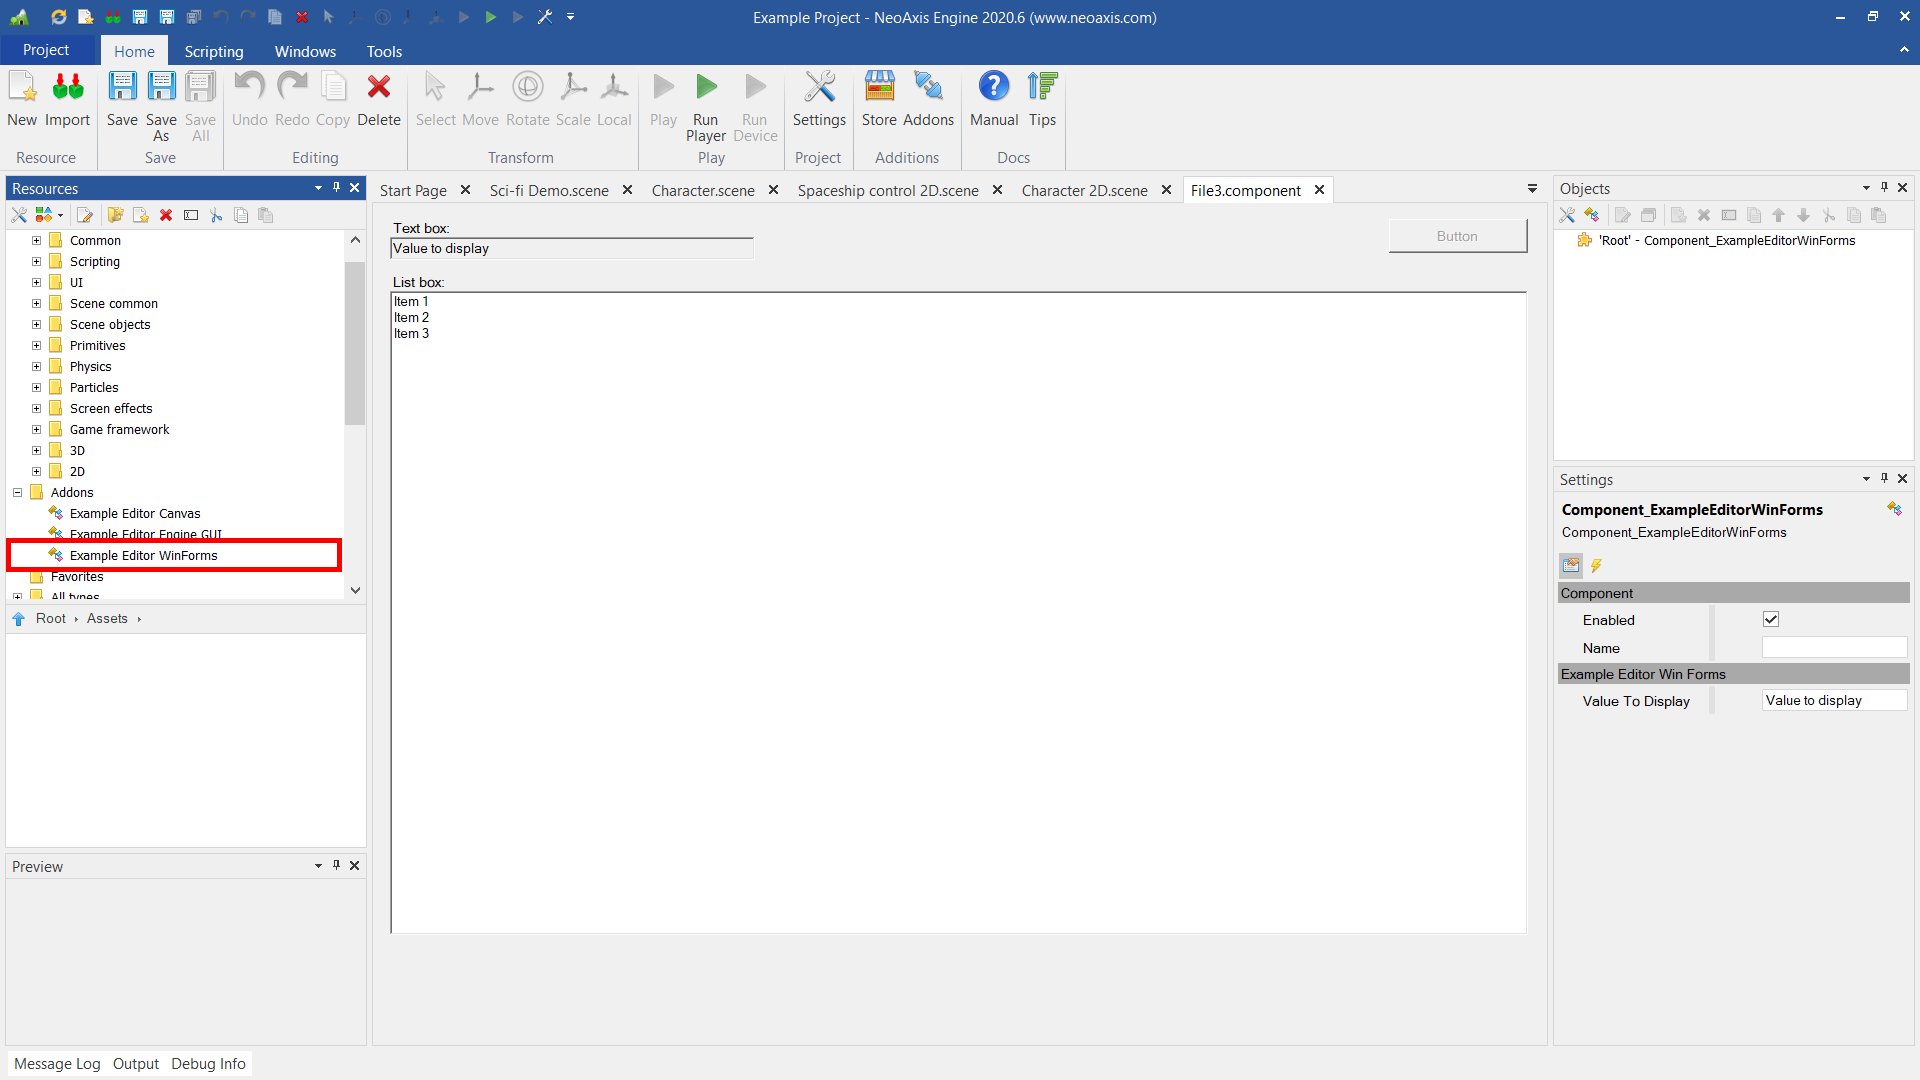
You can create full-fledged sub-editors inside the main editor. As examples, there are two sub-editors. The source code is in "Sources\NeoAxis.Addon.EditorExample".
The first example of a sub-editor uses a 2D canvas of the engine. Includes a template for the editor.
The second example made by using the built-in GUI of the engine.
The third example made by using WinForms.
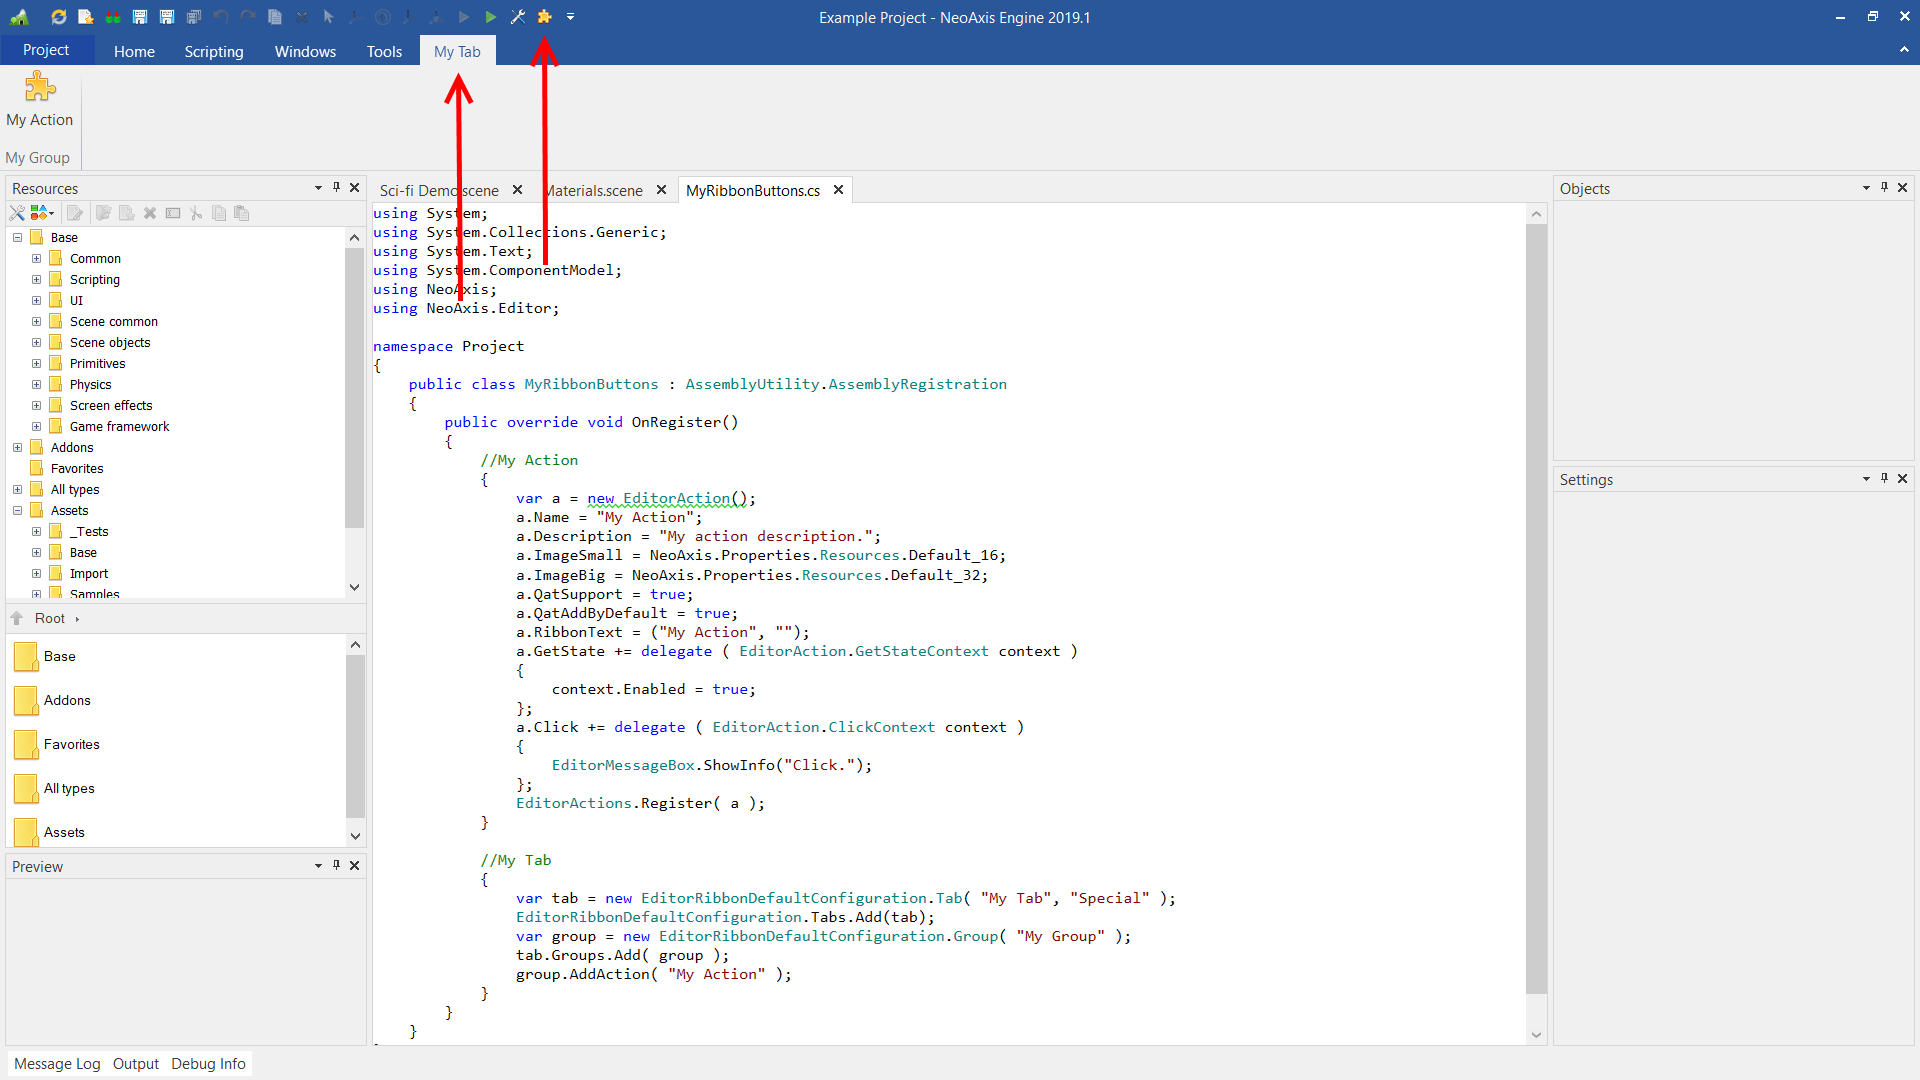
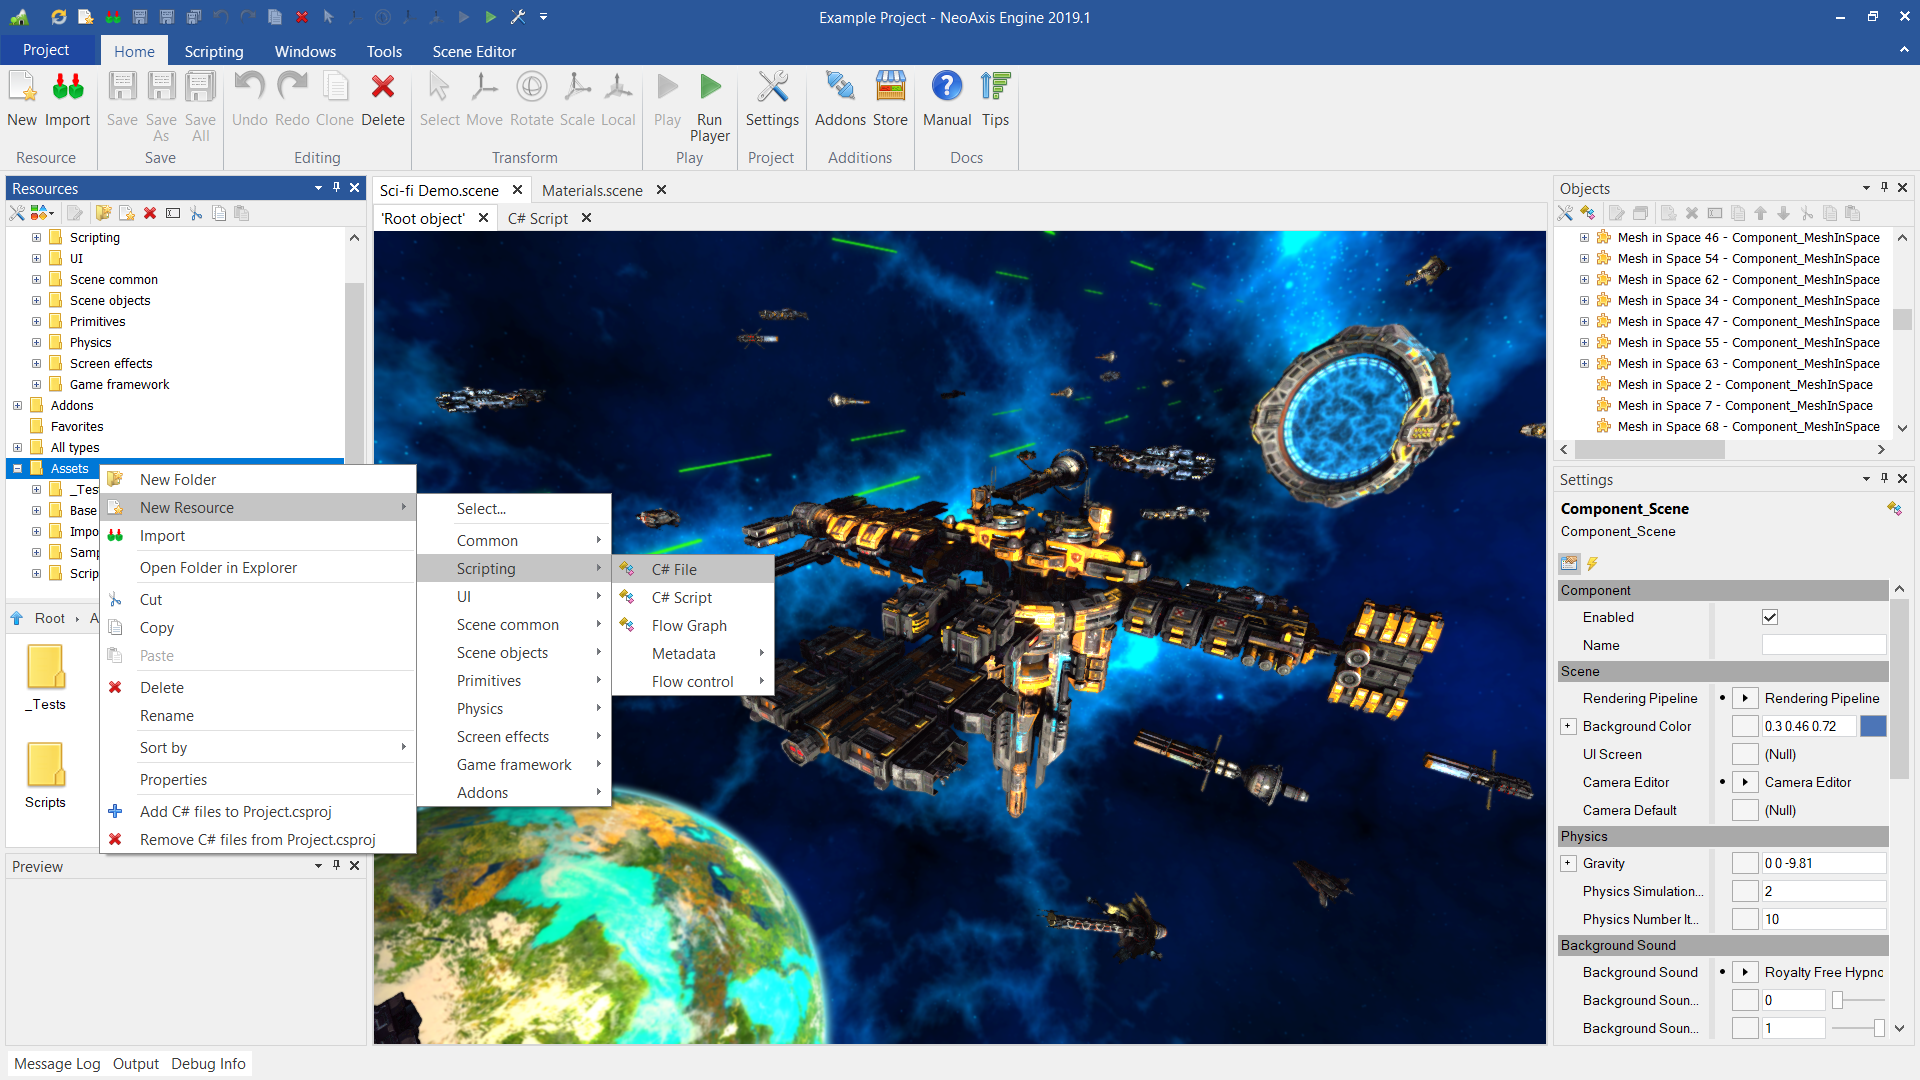
You can add individual action buttons in Ribbon and Quick Access Toolbar. You can do this directly in the editor.
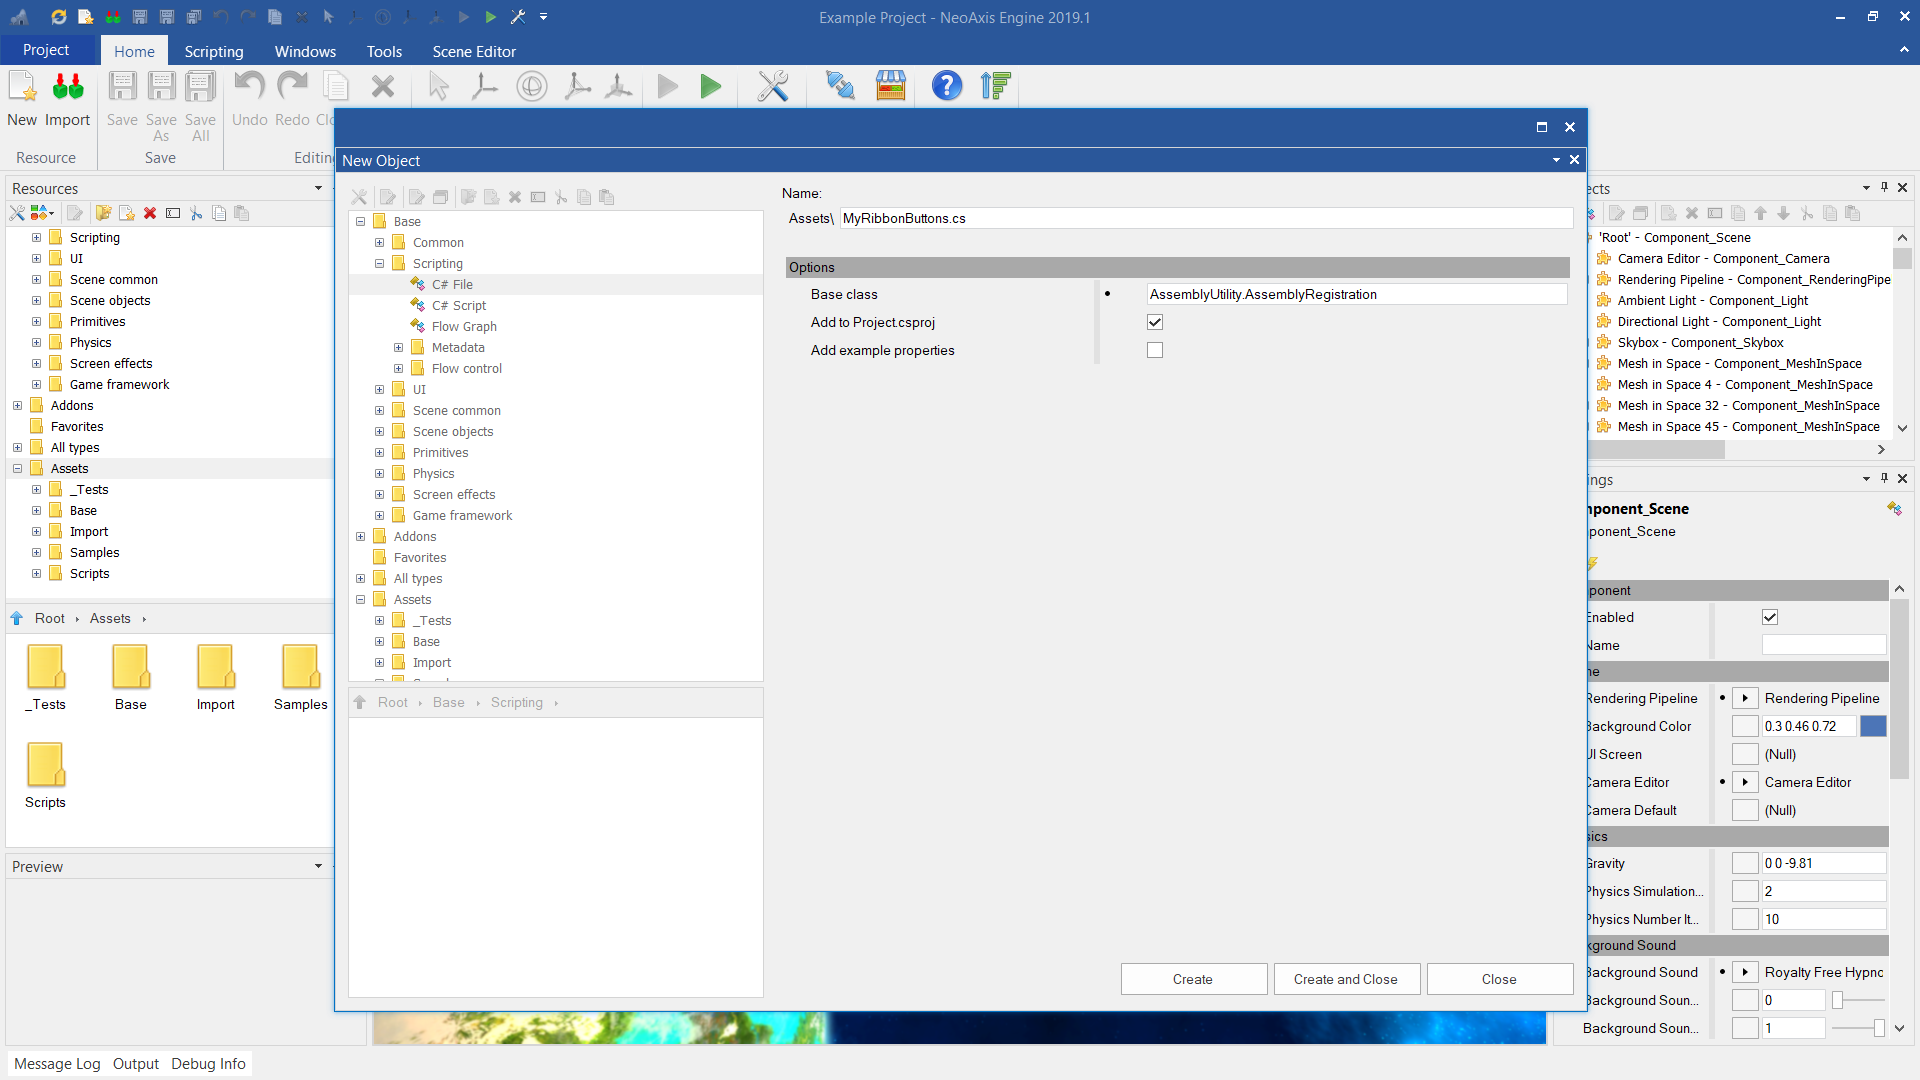
First, create a C# file.
When creating, specify the base class AssemblyUtility.AssemblyRegistration. This class is needed to perform any actions when initializing the engine.
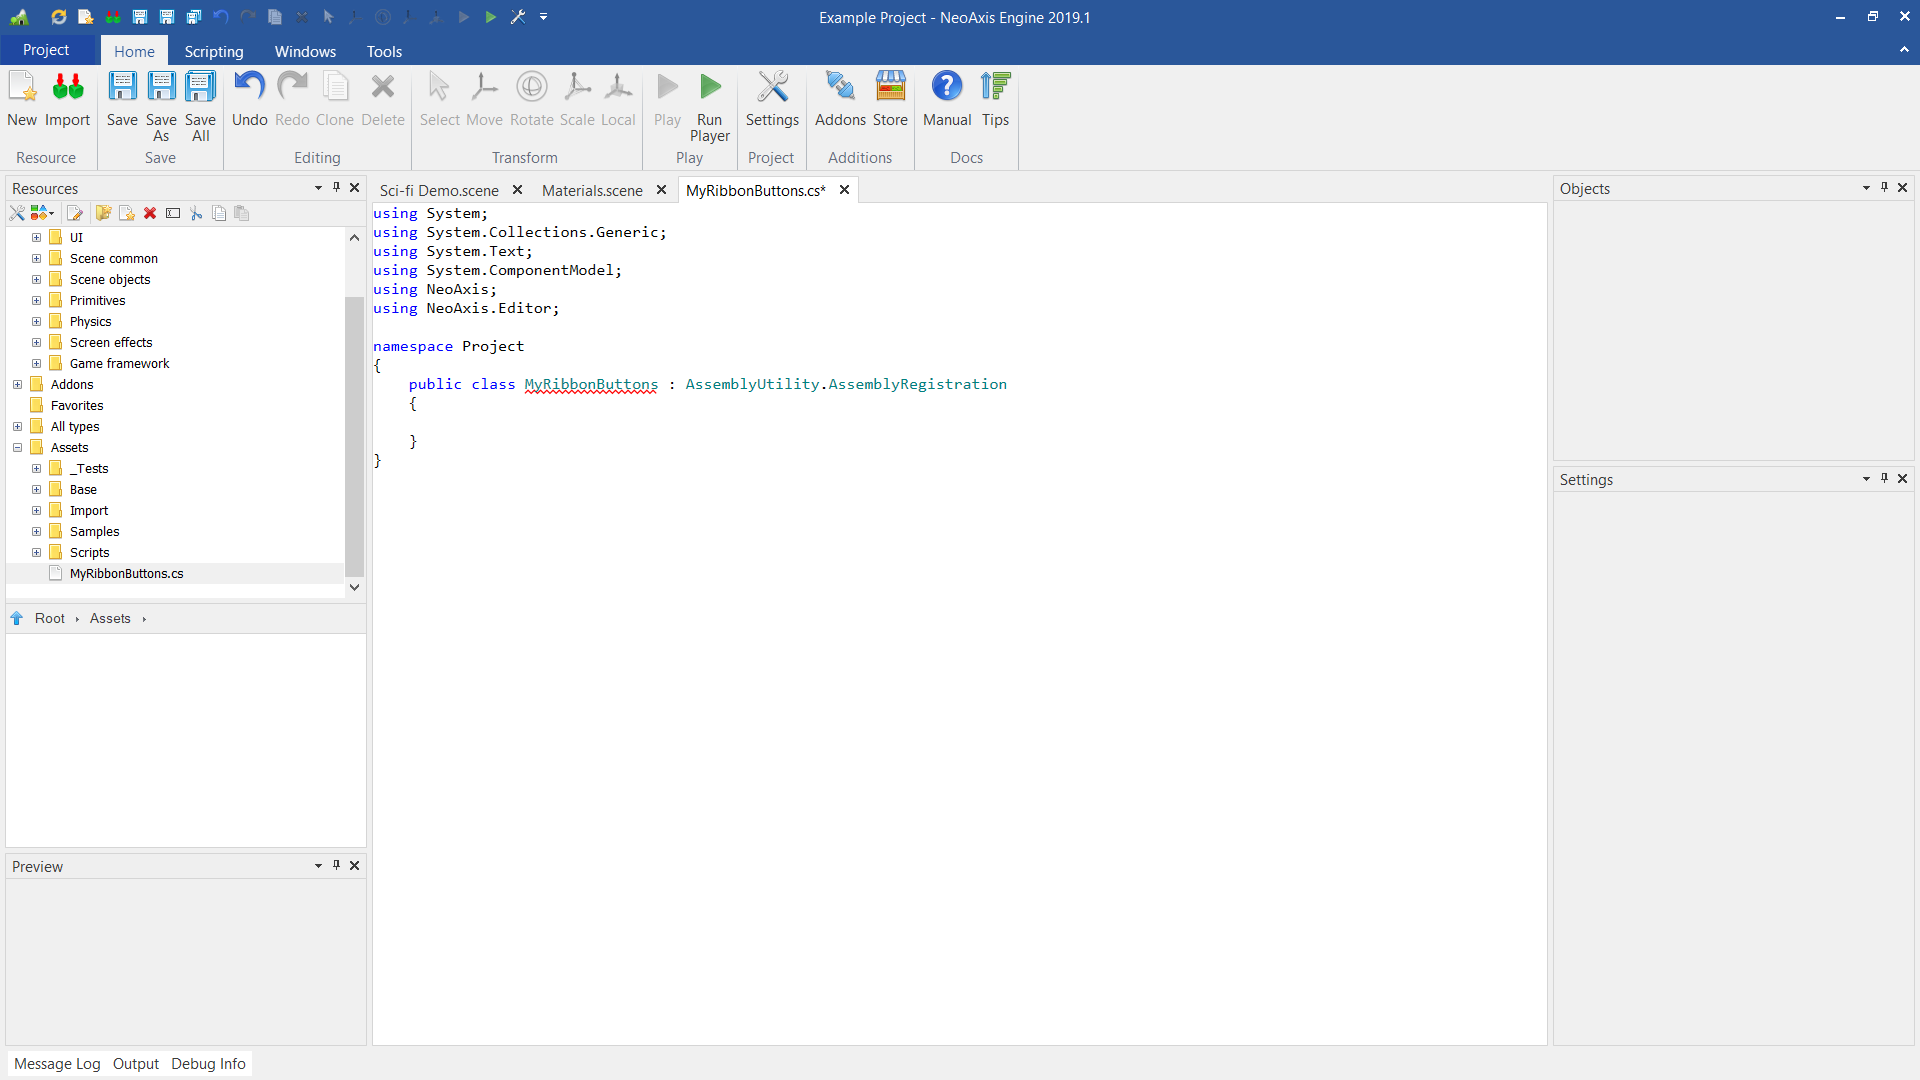
After creation, the C# code editor will open.
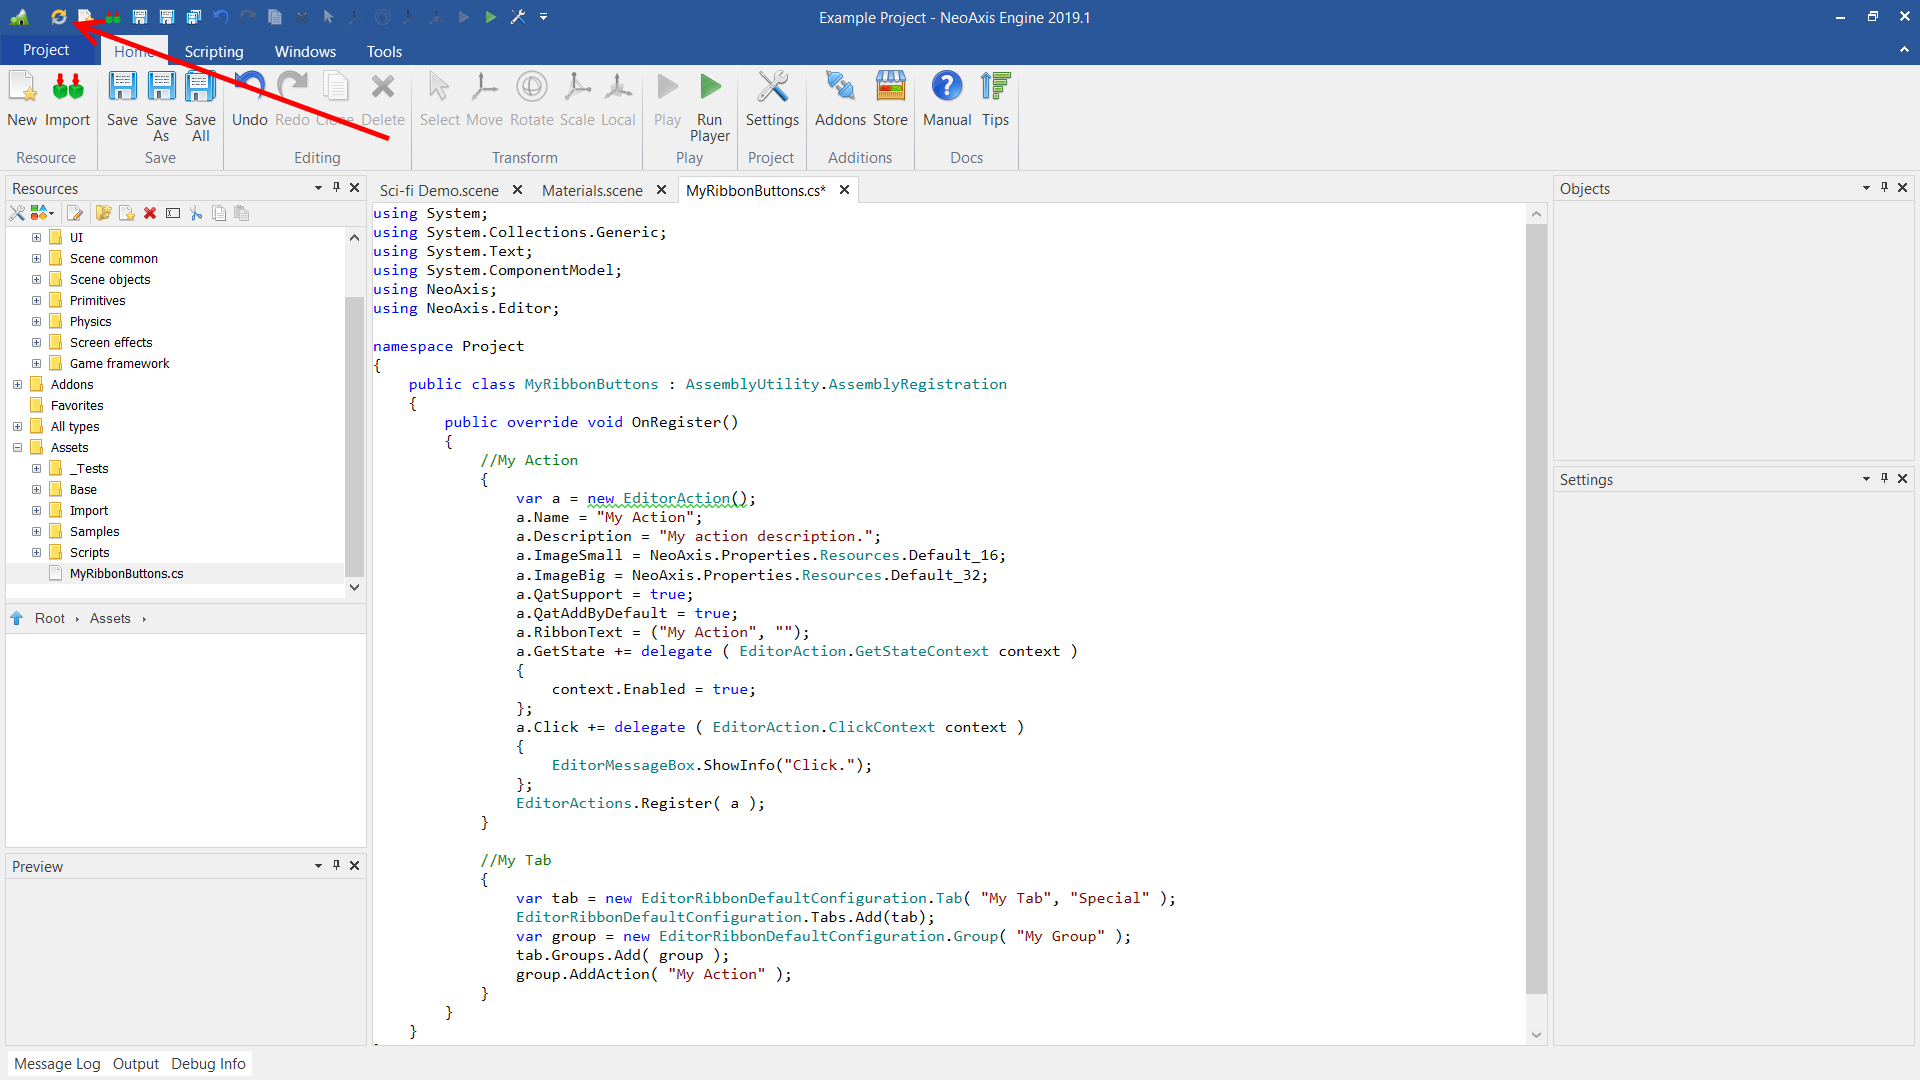
OnRegister() method is being created in the class. The code for creating the action and tab of the ribbon is added.
using System;
using System.Collections.Generic;
using System.Text;
using System.ComponentModel;
using NeoAxis;
using NeoAxis.Editor;

namespace Project
{
        public class MyRibbonButtons : AssemblyUtility.AssemblyRegistration
        {
                public override void OnRegister()
                {
                        //My Action
                        {
                                var a = new EditorAction();
                                a.Name = "My Action";
                                a.Description = "My action description.";
                                a.ImageSmall = NeoAxis.Properties.Resources.Default_16;
                                a.ImageBig = NeoAxis.Properties.Resources.Default_32;
                                a.QatSupport = true;
                                a.QatAddByDefault = true;
                                a.RibbonText = ("My Action", "");
                                a.GetState += delegate ( EditorAction.GetStateContext context )
                                {
                                        context.Enabled = true;
                                };
                                a.Click += delegate ( EditorAction.ClickContext context )
                                {
                                        EditorMessageBox.ShowInfo("Click.");
                                };
                                EditorActions.Register( a );
                        }

                        //My Tab
                        {
                                var tab = new EditorRibbonDefaultConfiguration.Tab( "My Tab", "Special" );
                                EditorRibbonDefaultConfiguration.Tabs.Add(tab);
                                var group = new EditorRibbonDefaultConfiguration.Group( "My Group" );
                                tab.Groups.Add( group );
                                group.AddAction( "My Action" );
                        }
                }
        }
}
Finally, you need to restart the editor. This can be done using the Restart Application button in the Quick Access Toolbar.
After the restart, a tab in the ribbon and a button in the toolbar will appear.