Creating a New Project in NeoX |
Creating a New Project in NeoX
This page describes creating cloud projects in NeoX.
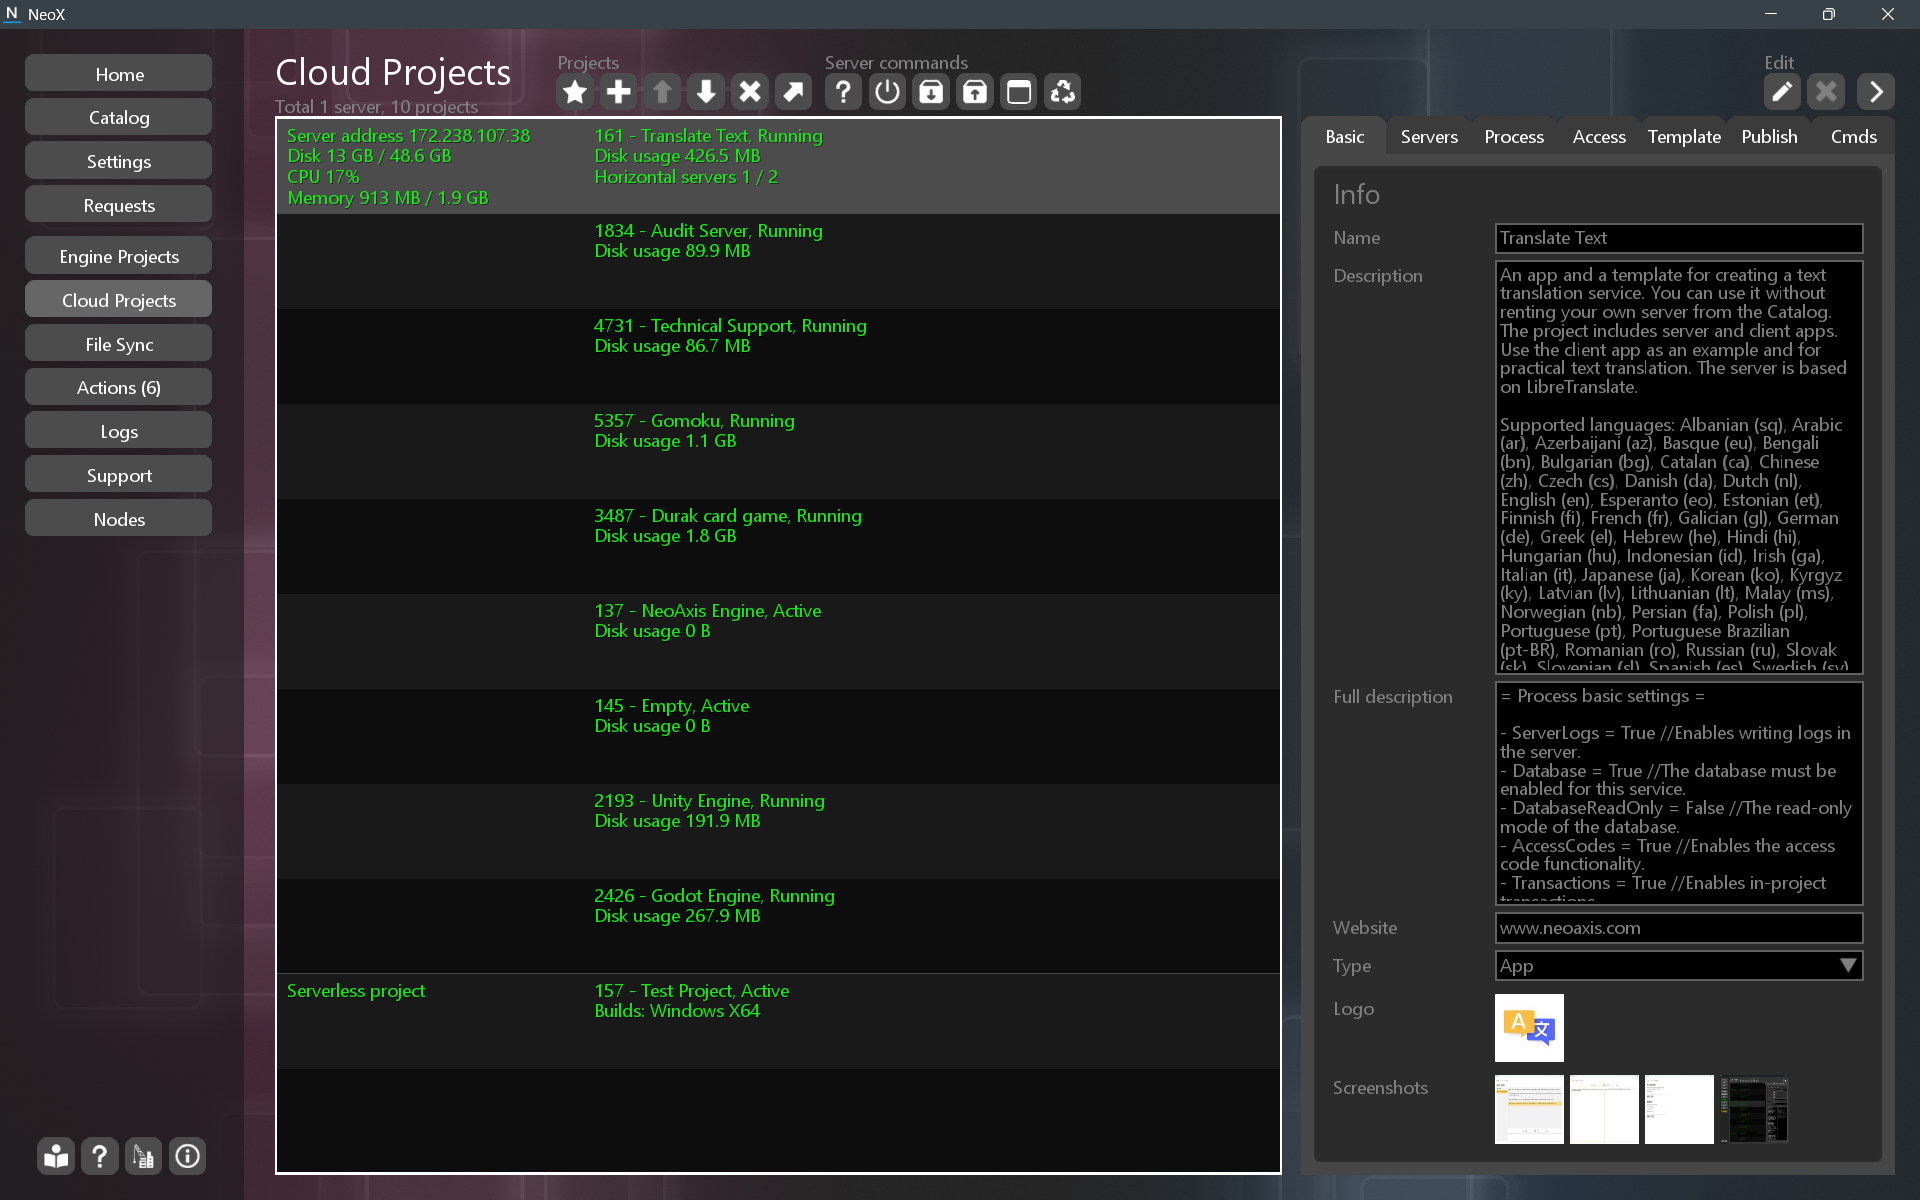
Cloud projects are created on the Cloud Projects page. The page includes a toolbar, a list of projects, and project properties.
In the screenshot, you can see a created server with several projects and a project without a server.
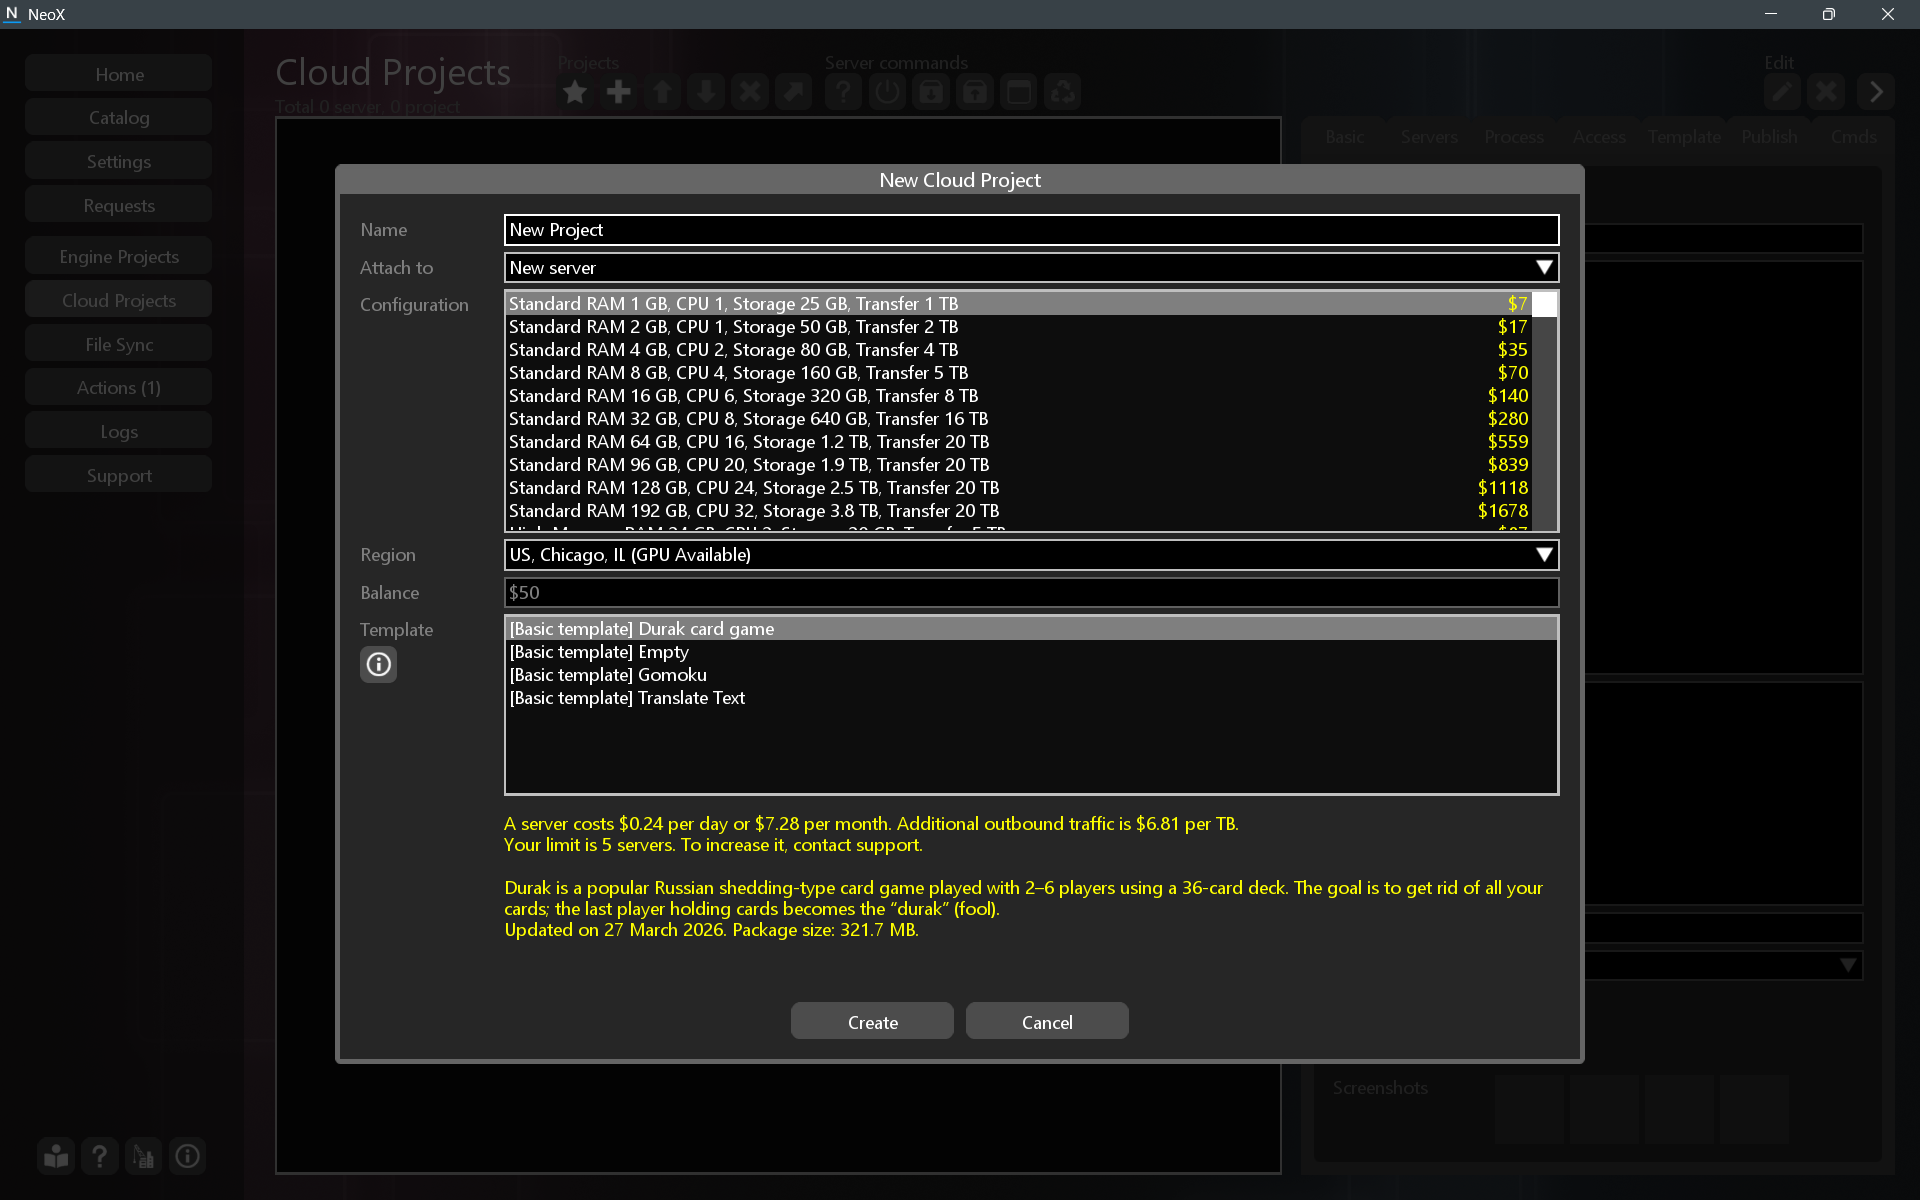
To create a new project, click the ![]() "Create a new cloud project" button in the toolbar. A positive wallet balance is required, which can be topped up on the Settings page.
"Create a new cloud project" button in the toolbar. A positive wallet balance is required, which can be topped up on the Settings page.
In the window that appears, a list of available servers and templates will be shown. You can start with the cheapest server; it is sufficient for basic templates. Select a starter template; the list of templates can be viewed in the product catalog. After clicking the Create button, the project will begin creating; this may take a few minutes.
Variants:
- If you already have a server for another project, you can host the new project on that server.
- You can create a project without a server; this is called a Serverless project. This type is used for publishing content or projects that do not require a server.
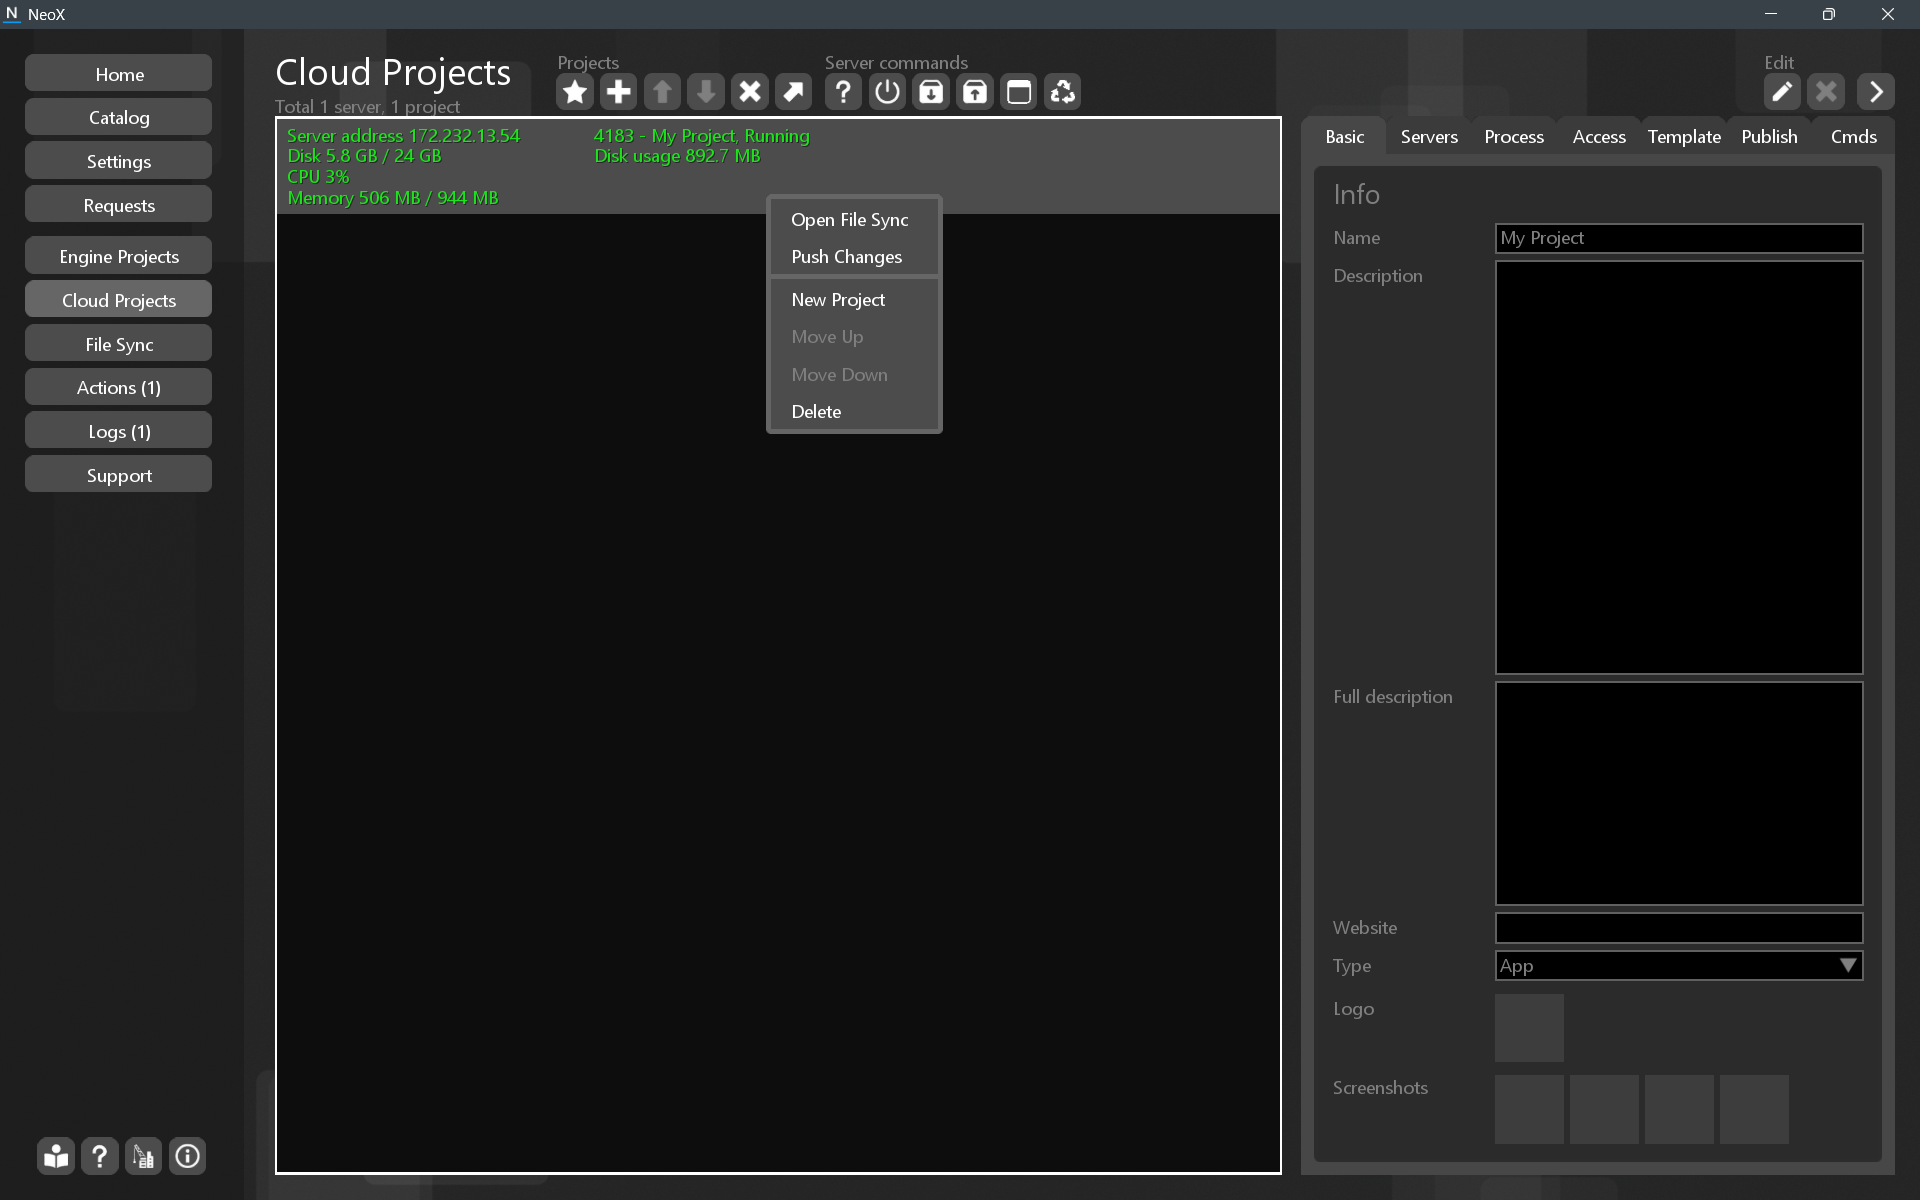
After creating a project, it will appear in the list. Wait until the project color turns green.
Right-click to open the context menu, then click “Open File Sync” to continue.
The toolbar contains common commands for managing projects and servers.
Projects group:
| Icon | Description |
|---|---|
| Change the publisher settings. | |
| Create a new cloud project. | |
| Move the selected project or server higher up in the list. | |
| Move the selected project or server lower down in the list. | |
| Delete the selected project. | |
| Transfer the selected project to another server. |
Server commands:
| Icon | Description |
|---|---|
| Get detailed info of the selected server. | |
| Restart the server. | |
| Make a backup of the server. | |
| Restore the server from a backup. | |
| Manage root access to the server. | |
| Manage the server's internal files. |
Project settings:
| Icon | Description |
|---|---|
| Start editing the selected project. | |
| Cancel editing the selected project. | |
| Configure the visibility of the project settings. |
To start editing project properties, click the ![]() "Change the selected project" button in the toolbar above. Click the button again to saves the changes or click the
"Change the selected project" button in the toolbar above. Click the button again to saves the changes or click the ![]() "Cancel changes" to cancel.
"Cancel changes" to cancel.
To hide the project properties panel, use the ![]() "Configure the visibility of the project settings" button.
"Configure the visibility of the project settings" button.
In the Basic tab, you configure the project’s name, description, type, logo, and screenshots.
In the Servers tab, you configure backups of the main server and the project's additional servers.
An example of using additional servers can be found in the Translate Text template.
TO DO: It is not yet possible to change the configuration of the main server. To upgrade the server, you need to rent a new server and migrate the project. To migrate the project, use the toolbar button ![]() "Transfer the selected project to another server".
"Transfer the selected project to another server".
In the Process tab, you configure the project's server process.
A properly configured process usually has parameters in the Settings field. In "Summary of the main server" you can see the server status. Startup errors can be found on the Logs page.
In the Access tab, you configure the ability to run without publishing, the ability to enable the Web API, and access to the server via FTP.
The "Play unpublished" option can be used for internal projects. This is useful when you do not want to show the project in the catalog but still want users to be able to connect.
Web access allows making requests from a browser and performing web requests. Web access works via the system's front servers. As an example, the translation service web page is available at https://cloud.neoaxis.com/web/translate/get_info. An example of usage is available in the Translate Text template.
FTP access allows connecting to the server via the FTP protocol. The primary way to work with project files is File Sync.
The Template tab allows you to provide a project template for other developers.
The Publish tab is intended for configuring product publication. To publish, enable the "Submit to publish" checkbox; the "Publication status" field displays the publication status.
The Cmds tab (short for Commands) contains a list of project commands. You can add your own commands from the project's server code.
List of standard commands:
| Name | Description |
|---|---|
| Restart | Restart the project process. |
| Backup | Create a project backup. In the Servers tab, you can configure automatic server backups. |
| Restore | Reset project files to the template's initial state. |
| Changes | Get a list of changes to the project's settings. |
| Template | Create a template build. |
| HorizontalServerBuild | Create a build for a horizontal (additional) server. |
| HorizontalServerNew | Rent a horizontal server. |
| HorizontalServerDelete | Delete a horizontal server. |
| HorizontalServerDeleteAll | Delete all horizontal servers. |
| HorizontalServerReset | Reset horizontal server files to the template's initial state. |
| HorizontalServerResetAll | Reset all horizontal servers to the template's initial state. |
| BuildWindowsX64 | Create a build for Windows x64. |
| DatabaseClearSaveStrings | Delete all records from the project's SaveStrings table. |
| DatabaseDeleteAll | Delete all project database collections. |
| PythonGetVersion | Show the Python version on the Logs page. |
| DockerGetVersion | Show the Docker version on the Logs page. |
| DockerInstall | Reinstall Docker on the server. |